A 10-Step Guide to Studio-Free Menu Photography
Menu photography is one of the most visible factors influencing a guest's ordering decision. What's more, you don't always need to set up a professional studio to get good results. With the right lighting, simple equipment, a standard shooting flow, and digital menu management, you can produce strong visuals in your restaurant with your own team. In this guide, you will find a repeatable, 10-step system that does not strain operations, for restaurant and cafe owners who want to shoot without a studio.
1. Decide on your menu strategy first, not on the shoot
The most common mistake is trying to randomly photograph every product on hand on the same day. Yet a good menu photo starts with first knowing which product will be highlighted and why. Before the shoot, divide your products into three groups: signature products, profitable products, and new products. That way, photo production stops being merely an aesthetic task and becomes connected to a sales goal.
For example, in a coffee shop, instead of shooting all beverages with the same priority, you can bring forward the special latte series with the highest margin, the frequently sold desserts alongside it, and seasonal beverages. At a burger restaurant, rather than the classic menu, a burger with a strong visual layering effect, with crispy fries and a sauce combination beside it, works better.
At this stage, the following questions should be clear:
- Which products will be shown first in the digital menu?
- Which products will be featured as a campaign or recommended product?
- Which products' photos will be updated frequently?
- Which plates are visually strong but operationally hard to prepare?
Making this plan in advance protects the time of the kitchen and service teams on shoot day.
2. Instead of the most expensive equipment, find the right light
In studio-free shooting, the most critical factor is light rather than the camera. A window edge that receives natural light is the best starting point for most restaurants. Softer, directional light should be preferred over harsh midday sun. When light hits the product from the side or at a slight diagonal angle, volume, texture, and freshness show up better.
Shooting under ceiling lighting usually gives poor results; glare on the plate, color casts, and harsh shadows form. That is why, if possible, move the product to a table near the window. To balance the light, you can use a white piece of cardboard or a light-colored menu cover as a reflector. This simple method brings out the details, especially in burger buns, croissant surfaces, or creamy beverages.
If you need to shoot during evening service, use a single, fixed light with one color temperature. Environments where different bulbs are mixed produce unnatural colors, especially in soups, meat, and desserts.
3. Simplify the background, make the plate the subject
A menu visual and a social media visual are not the same thing. On social media, more creative frames with a story can work; but in the menu, the product needs to be clearly understood. For this reason, do not use many distracting objects in the background. On the table, a napkin holder, the bill folder, a sauce bottle, a heavily patterned placemat, or reflections off shiny cutlery can upstage the product.
For a good start, apply the following approach:
- Choose a neutral surface: wood, a matte stone texture, or a plain light-colored surface.
- Leave only 1-2 supporting objects that complement the product in the frame.
- Instead of making the portion look larger than it is, preserve the real presentation.
- Always clean the edges of the plate before shooting.
For example, in a pasta photo, just a fork, a little parmesan, and a plain linen napkin are enough. Anything more pulls the guest's attention away from the plate.
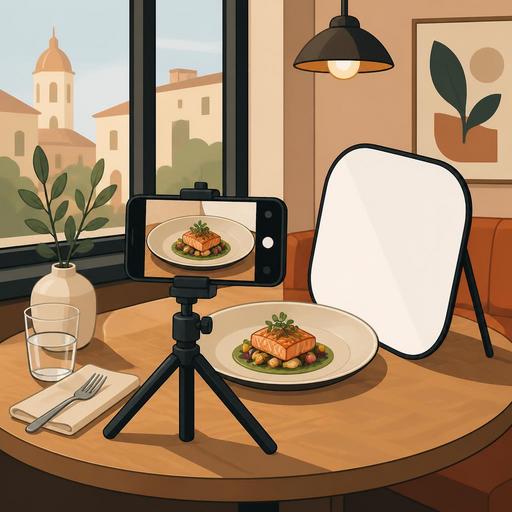
4. If shooting with a phone, define standard angles
Current smartphones are usually sufficient for menu photography. What really makes the difference is using a consistent shooting angle for each product. Consistency provides a professional look, especially on QR menu and online ordering screens.
To set up a practical system, define the shooting angle by product group:
- Pizza, breakfast plate, mezze, salad: a top-down shot is usually more descriptive.
- Burger, sandwich, slice of cake: a 45-degree angle shows the layers better.
- Beverages: a side or slightly diagonal angle brings out the glass height and texture.
- Soups and bowl products: a slight top angle makes the contents visible.
If the phone's wide-angle lens creates distortion at the edges, rather than getting too close to the product, shoot from a bit further back and crop. Finding the physically correct distance gives a cleaner result than digital zoom. If possible, stabilize the phone with a small tripod; getting similar frames for the same product family becomes very easy.
5. Prepare the product for the guest, not for the camera
Presentations that look good in a photo but have no real counterpart in service may grab attention in the short term, yet create a loss of trust in the long term. For this reason, there should be reasonable consistency between the shoot plate and the actual service. The menu photo is part of expectation management.
That said, some small touches are completely natural. Surface cleaning on grilled products, aligning the layers in a burger, a fresh finishing touch on a salad, or a controlled drizzle of sauce on a dessert strengthen the photo. The aim here is not to make the product look different than it is, but to present it in its best state.
A concrete example: a waffle that spreads out once the lid closes in takeaway can look neater with controlled placement during the shoot. But the portion size, the amount of fruit used, and the sauce balance must stay consistent with the actual service.
6. Create a mini operation plan for shoot day
At many businesses, photo shoots are postponed because they disrupt the kitchen flow. To prevent this, manage the shoot not like a production, but like a short operation plan. Line up the products to be shot, prepare the necessary plates and props for each product in advance, and clarify who is responsible.
A simple division of tasks is enough:
- One person prepares the product.
- One person cleans the plate and adds the finishing touch.
- One person takes the shot.
- One person checks the file names and product matching.
This last item is important. Because even the best photo, if uploaded to the wrong product card, disrupts the menu experience. File organization is essential, especially for similar beverages, burgers of different weights, or products with a sauce option.
7. Edit, but don't make the product unrecognizable
Photo editing should be used more to clean up a good shot than to miraculously rescue a bad one. Basic adjustments are usually enough: brightness, contrast, white balance, light sharpening, and cropping. Over-saturation, artificial blur, and aggressive filters can make food look like plastic.
The goal of good editing is this: when the product actually comes to the table in real life, it should look familiar to the guest. Color accuracy is important, especially in meat products, coffee foam, chocolate sauce, and greens. In addition, using a similar editing language across the whole menu strengthens brand perception.
This is where digital menu management comes into play. Instead of storing product photos one by one in a scattered way, if you build a category-based structure, managing visuals also becomes easier during seasonal changes or price updates. The risk of accidentally leaving an old image live while uploading a new photo decreases.
8. Test the photo not on its own, but within the menu flow
A product photo can look great on its own but be inconsistent with the visuals next to it on the menu screen. For this reason, the real test after the shoot is not looking at the photo in the gallery; it is evaluating it within the actual menu flow. If within the same category some visuals are too dark, some are too close-up, some are horizontal and some vertical, the user experience becomes fragmented.
As a checklist, look at the following:
- Are all product visuals in a similar ratio and framing?
- Does the photo support the product name and contents?
- Is there color and light consistency between visuals that appear side by side?
- Do campaign or featured products really stand out visually?
This test is very valuable, especially at businesses using a QR menu. Because the guest often makes their decision quickly; a confusing visual layout can reduce the desire to order, independently of product quality.
9. Build a repeatable system for seasonal and operational changes
The real power of DIY menu photography is sustainability, not a one-time shoot. A cafe switching to a summer menu should be able to maintain the same shooting language as months earlier when adding new cold beverages. Likewise, when there is a chef change, a plate update, or a portion revision, you should not have to rebuild the entire visual language from scratch.
For this, prepare a short internal standard: at what hours the shoot is done, which table is used, which backdrop is preferred, which angles are applied, and how files are named. This document does not have to exceed a few pages; but it preserves the quality standard when new staff arrive.
This is also one of the important aspects of restaurant digitalization: knowledge does not stay tied to individuals, it becomes a process. The steps of menu management, visual updates, and publishing products proceed in an orderly way.
10. On the first shoot, aim for a usable standard, not perfection
Many businesses delay the shoot with the thought "the whole menu must be flawless." Yet the best approach is to first achieve a clean standard on the best-selling and most profitable products. Then the remaining products are added gradually. That way the team does not get worn out and the digital menu strengthens quickly.
To start, choose 10 products. Shoot them the same day in similar lighting, on the same background, with predetermined angles. The following week, observe their performance within the menu: which product gets more interest, which visual stays weak, which category needs a reshoot. This agile approach is more realistic, especially for businesses with heavy service traffic.
Ultimately, studio-free menu photography does not mean getting by on a low budget; it means producing faster, more consistent, and more manageable visuals with the right system. When light, angle, presentation, and the digital menu flow are considered together, the guest's first impression in front of the screen becomes much stronger.
If you want to update your menu visuals regularly and move them into the digital menu flow in a more controlled way, Restomas can help you manage this process with a simple structure.