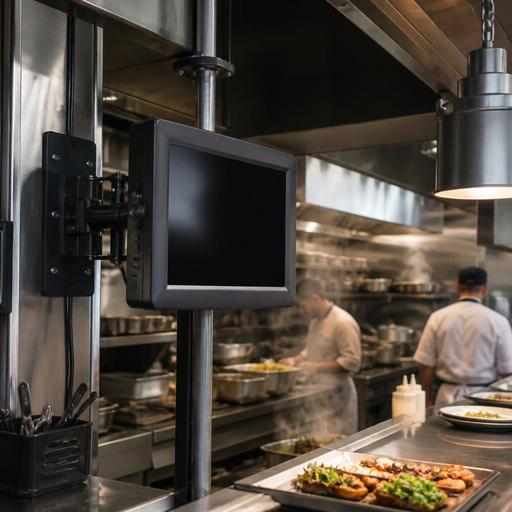
Choosing Kitchen Display Screens for Heat, Steam, and High-Volume Service
Choosing kitchen display screens for heat, steam, and high-volume service is not the same as buying a standard office monitor and mounting it near the pass. In a working kitchen, screens face grease in the air, sudden temperature shifts, constant touches, cleaning chemicals, vibration, and long operating hours. For restaurant owners and kitchen managers, the right choice affects ticket visibility, speed of service, staff confidence, and maintenance costs just as much as it affects hardware performance.
A screen that looks fine in a showroom can become unreadable above a hot line, unreliable near a dishwasher station, or frustrating during a rush when cooks need instant response. The practical question is not only which screen is cheapest, but which setup will keep working during lunch peaks, weekend dinner volume, and repeated cleaning cycles. That means evaluating the kitchen environment first, then matching the screen type, placement, mounting, brightness, and workflow integration to the way your team actually works.
Start with the kitchen zone, not the product catalog
Many buying mistakes happen because operators shop by screen size alone. A better starting point is to map where the screen will be used and what it will be exposed to. The expo station, fry station, pizza line, bakery pass, and dish area all create very different conditions.
For example, a screen placed near a charbroiler may deal with radiant heat and airborne grease. A screen near a dish pit may be less exposed to oil but face heavy steam and frequent splashing. A pastry station may be cooler overall, yet still require wide viewing angles and easy cleaning because multiple staff members check orders at once.
Before choosing hardware, walk the line and note:
- How close the screen will be to ovens, fryers, grills, steam tables, or dishwashers
- Whether staff will touch the screen directly or only view it
- How often the area is cleaned and which chemicals are used
- Whether the station has wall space, shelf space, or ceiling-mount options
- How many orders must be visible at one time during peak service
- Whether glare from windows, heat lamps, or stainless surfaces affects readability
This simple review often shows that one kitchen may need two different screen types or mounting approaches rather than one standard device everywhere.
Focus on durability features that matter in real kitchens
Restaurant buyers are often presented with long spec sheets, but only a few factors make the biggest difference in daily use. The most important question is whether the screen is designed for commercial environments with moisture, grease, and long runtimes.
Heat tolerance and ventilation
Kitchen screens should be able to operate for long shifts without overheating. This is especially important if the screen sits in an enclosure, under a shelf, or close to equipment that throws off heat. A bright display with poor ventilation may dim, lag, or shut down at the worst possible moment. Ask where heat escapes from the unit and whether the mounting position blocks airflow.
Sealed surfaces and cleanability
Open seams, exposed ports, and consumer-style bezels collect grease and are harder to sanitize. In a kitchen, smooth surfaces and better sealing matter because staff clean fast between tasks. If a screen is frequently wiped down, it should tolerate repeated exposure to restaurant-safe cleaners without the coating degrading or touch response failing.
Brightness and visibility
A screen that is readable in an office may be hard to read under heat lamps or in bright prep areas. Good brightness helps cooks read modifiers quickly, especially when the kitchen is moving fast and staff are glancing from an angle. Clear contrast also matters for color-coded tickets, timing indicators, and course sequencing.
Touch performance under pressure
If cooks will bump, tap, or swipe the screen with gloved or slightly damp hands, test responsiveness in realistic conditions. Some teams prefer a non-touch display controlled by a separate bump bar to reduce smudging and accidental input. Others want direct touch at lower-volume stations. The right choice depends on how the station works, not on which feature sounds more modern.
Choose the right format for each station
There is no single best kitchen screen format. The right option depends on ticket complexity, station spacing, and whether the screen is for viewing, interaction, or both.
- Overhead viewing screens: Best for stations where multiple cooks need to see orders at once. These are useful on make lines, pizza assembly areas, or expo rails where visibility matters more than direct touch.
- Touch-enabled displays: Best where one team member manages order flow, marks items complete, or handles course firing. These can work well at expo, dessert, or pickup coordination points.
- Display plus bump bar setups: Best in hot, greasy stations where direct touch is less practical. Cooks can keep the screen cleaner while still moving tickets quickly.
- Smaller secondary screens: Useful for splitting production by station, such as grill, fry, salad, and dessert, so each team sees only the orders relevant to them.
For example, a burger restaurant might use one larger display at expo, smaller dedicated screens at grill and fry, and a pickup-facing screen for completed orders. A cafe with a compact line may only need one well-placed display visible from espresso, warming, and handoff.
Placement and mounting decisions can make or break usability
Even a durable screen fails operationally if it is placed badly. In many kitchens, the mounting decision matters as much as the hardware itself. A screen that is too high forces neck strain. A screen that sits too low gets splashed. A screen mounted beside a fryer may survive technically but still become difficult to read because of grease film and glare.
Good placement usually follows a few practical rules:
- Keep the screen close enough for quick reading, but away from direct heat and splash zones
- Position it within the natural sightline of the station, so staff do not need to turn away from active cooking for long
- Use mounts that allow tilt adjustment for glare control and different staff heights
- Protect cables and connections from moisture, accidental pulls, and daily cleaning
- Leave enough access for maintenance, replacement, and deep cleaning
If possible, test the position temporarily before drilling permanent mounts. During a live shift, ask staff whether they can read modifiers, timing notes, and item counts without stepping away from the line. Their answers will often reveal layout problems faster than a technical checklist.
Think beyond the screen: integration, workflow, and support
A kitchen screen is only valuable if it fits into a reliable order workflow. Restaurant operators should evaluate how the display connects with the POS, online ordering, QR menu ordering, and front-of-house communication. A durable screen with weak workflow logic still creates bottlenecks.
For example, if online orders, table-side orders, and counter orders arrive in different formats, the kitchen may waste time interpreting tickets rather than cooking. If modifiers are inconsistent, cooks may miss allergy notes or remake items. If sold-out items are not updated quickly, staff will keep seeing orders for products that are no longer available. The screen is where these operational strengths or weaknesses become visible.
When reviewing a kitchen display setup, ask these questions:
- Can the order view be organized by station, course, or prep priority?
- Are modifiers and allergy notes easy to read at a glance?
- Can completed items be tracked clearly without confusion?
- Will the system continue to support your menu if you add combos, variants, or seasonal items?
- How quickly can staff or managers update item availability during service?
This is where a restaurant platform matters. When menu structure, order routing, and item availability are managed clearly, the kitchen screen becomes a true operational tool rather than just a digital replacement for paper tickets. Platforms like Restomas can support that broader flow by helping restaurants keep menus organized, route orders more clearly, and reduce confusion between guest ordering channels and back-of-house execution.
A practical buying process for restaurant owners
If you are replacing paper tickets or upgrading an older kitchen display setup, avoid making the decision based on price alone. A practical process usually works better:
- Map each station and identify heat, steam, grease, and splash exposure.
- Decide whether each station needs touch, non-touch, or display plus bump bar control.
- Test readability from the actual working position during a busy service period.
- Review mounting, cable protection, and cleaning access before installation.
- Confirm that the order interface supports your menu logic, modifiers, and routing needs.
- Train staff on how to use the system consistently and gather feedback after the first weeks.
The best kitchen screen is not the most expensive or the largest. It is the one your team can read quickly, clean safely, and trust during a rush. In real restaurant operations, durability and workflow fit matter more than flashy features.
If you are improving kitchen operations alongside digital menus and order flow, Restomas can help connect the guest-facing and back-of-house parts of that system in a practical way.